أنا انسانة فوضوية جدا، ولكن فيما يتعلق بأمور الدراسة والمواعيد الأخرى فأنني وبشكل مفاجئ اكون شخصاً في غاية التنظيم.
I'm huge missy person in general *Guilty* But when it comes to my school and my appointments I'm big organizing freak!!
كل سنة اشتري مفكرة يومية اكتب بها كل ما احتاج عمله لذاك اليوم، ومازلت احتفظ بكل مفكرات السنوات الماضية ^^ (لا أعلم حتى لماذا؟)، هذه المفكرات حرفياً تمتلكني وبدونها قد اضيع><.
every year I buy a daily planner where I write everything in and I've kept each one of them. Those Diaries latterly own me and I'd be lost without them.
لذا، هذه السنة قررت تغليف مفكرتي لعام ٢٠١٢ بطريقة تحفظها من إسوداد الغلاف وتوسخه او حتى تقطعه، لكن بنفس الوقت تعبر عن الحياة التي تحتويها بين طيات صفحاتها بطريقة مناسبة
So, this year instead of the black spots and cut threads its' covers gets at the end of each year I decided to cover my 2012 planner in way that it save yet representing the live it held within its pages.
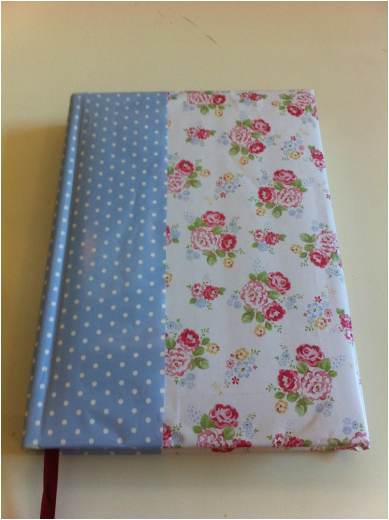
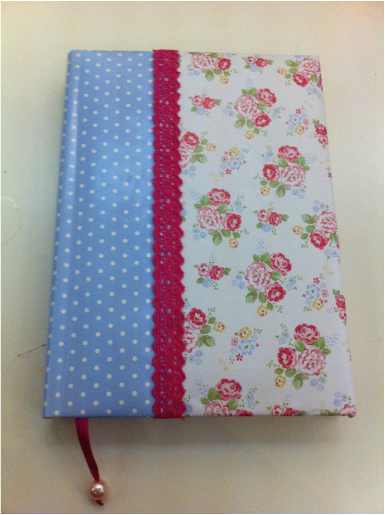
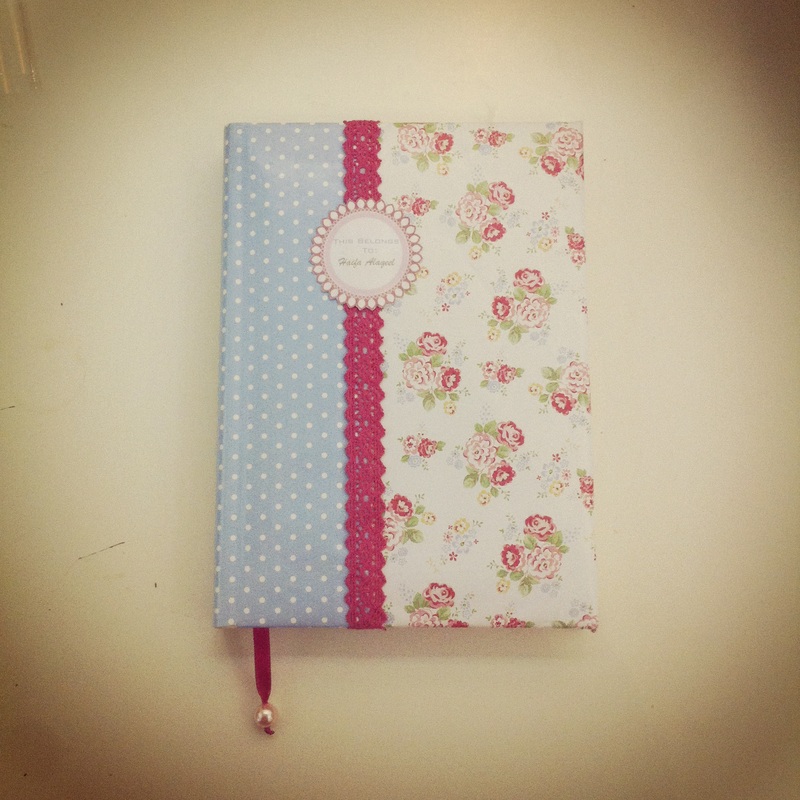
وهذا شكل مفكرتي النهائي ^^
and thats how my planner looks ^^

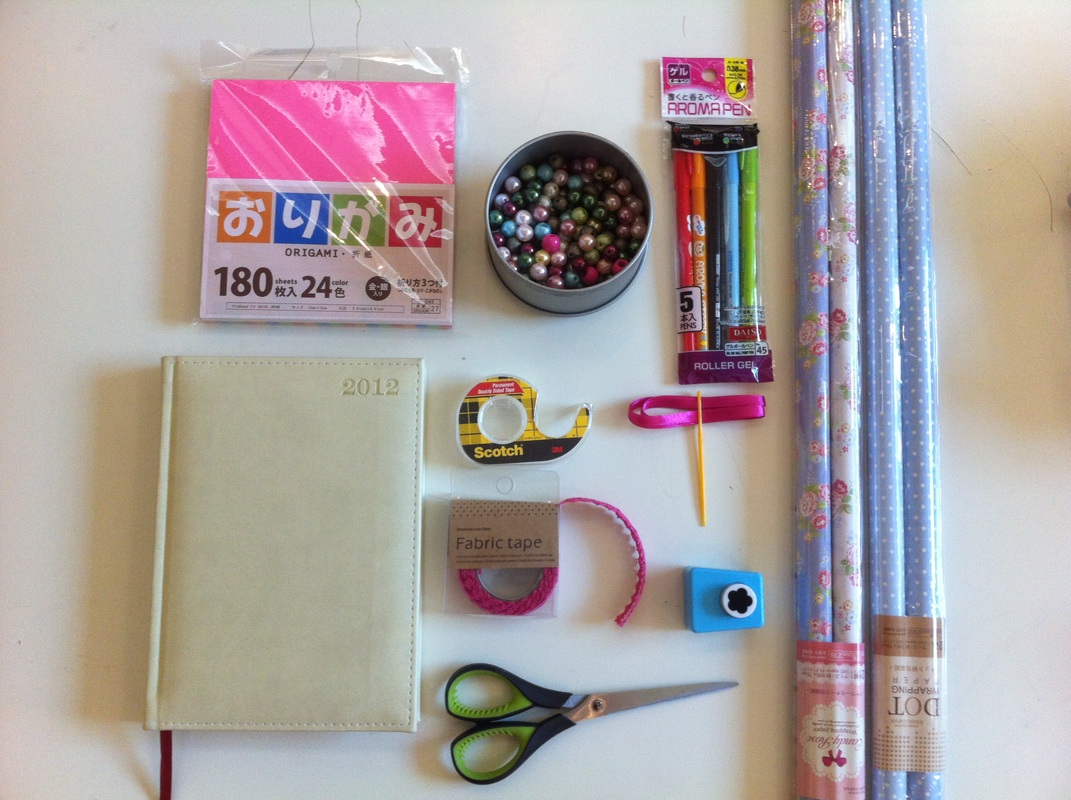
كل ما تحتاجونه هو :
مفكرة
ورق تغليف يفضل نوعان احداهما للقاعدة والاخر لاطراف الغلاف الخارجي للمفكرة
شريط لاصق من وجهين << يمكنك ايجاده في مكتبة جرير او مكتبات أخرى وبشركات مختلفة
قطعة شريطة لعمل فاصل
شريط مزخرف او قماشي
خرز لنهاية الفاصل
مقص
اوراق ملونه مختلفة لعمل الاسم
قطاعة ورق اشكال للتزين
ورق بلاستيك شفاف >> سولفان
مظروف بحجم مناسب
you need:
planner
double sided tape
piece of ribbon to make the bookmark
beads for the end of the bookmarks
washi tape or fabric tape
scissors
different colored paper to make a tag
different shaped cutters (punchers)
plastic transparent paper
a proper sized envelope
planner
double sided tape
piece of ribbon to make the bookmark
beads for the end of the bookmarks
washi tape or fabric tape
scissors
different colored paper to make a tag
different shaped cutters (punchers)
plastic transparent paper
a proper sized envelope
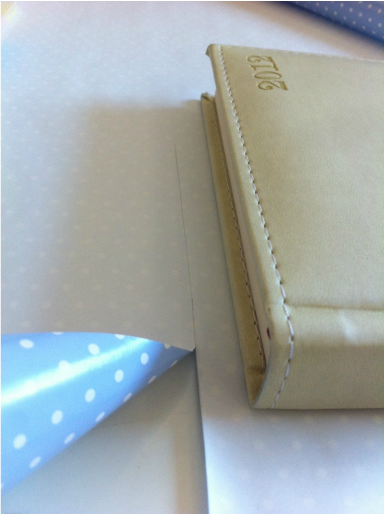
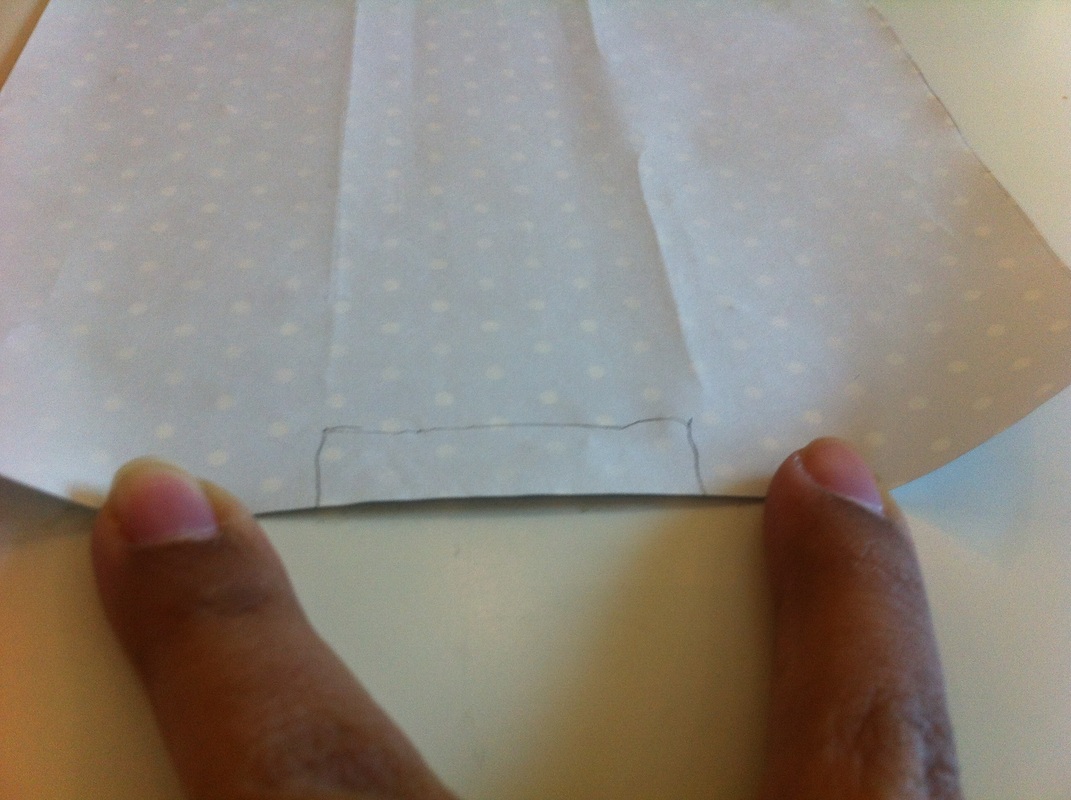
اختاري نوع الورق الذي تريدنه في الجهة اليمنى من المفكرة، استخدمي القلم والمسطرة لرسم خط حتى يسهل القص عليه تأكدي ان لا تكون قطعة الورق تغطي المفكرة بأكملها ودعي مجالا للورق من النوع الآخر ان يغطي جزءاً، ضعي علامة على المفكرة في النقطة التي انتهى القص chose the type of paper you want it to be at the right side of the planner and draw a line using a ruler to make it easer to cut. make sure that you let some space for the other type paper to cover. put a mark on the planner where the 1st paper ends.

خذي الورق الآخر وبنفس الطريقة السابقة وقصّيه بحيث تكون القطعة اكبر من العلامة التي وضعناها في المفكرة وقصي قطعة اخرى مماثلة لها بحيث تكون لدينا قطعتان لكل جهة من المفكرة. take the other paper, the one we'll use for the other side and cut it the same way we did previously. make sure that the paper extend beyond the mark we put in the planner. now make a copy of this paper for both sides.
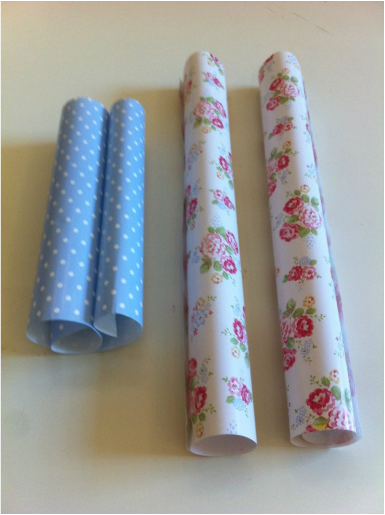
الان سيكون لديك قطعة واحدة من الورق الاول وقطعتان من الورق الثاني لكل غلاف من المفكرة now you'll have 1 piece for the base of the planner from the 1st paper and 2 pieces for each side of the cover from the 2nd paper.
ضعي القطعة الخاصة بالقاعدة بها وارسمي خطاً لقطع زوائد القاعدة فقط draw a line on the base extensions to cut it off
بعد رسم الخطين الخاصين بالامام والخلف ارسمي خطاء بينهما وقصي على الخط after you draw both front and back lines, draw a line between them an cut on it
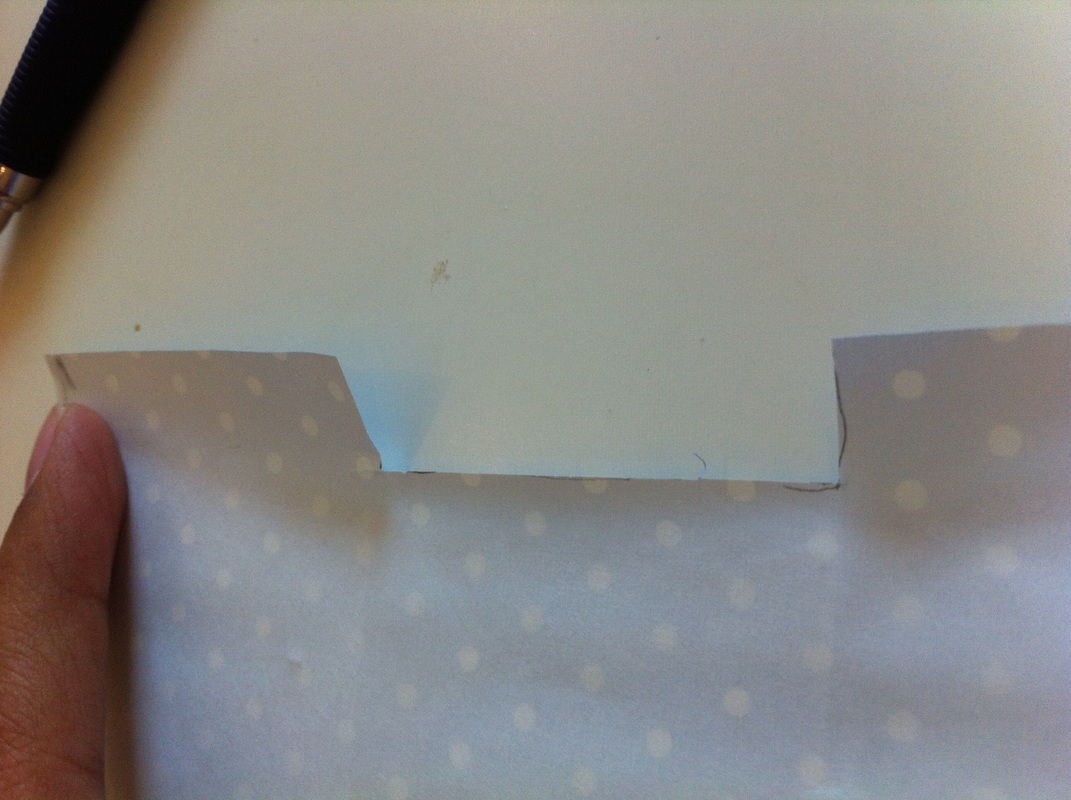
وهذا ما ستحصلين عليه and thats what you gonna get

ضعي ورقة القاعدة على المفكرة مع مراعاة العلامات التي سبق تعليمها في اطراف المفكرة put the base paper on the cover and pay attention to the marks marked previously on the planner
ضعي شريطاً من الشريط اللاصق ذي الوجهين والصقي قطعة القاعدة paste the base paper on the planner using the tape
الان ضعي الورقتين الاخريتين اسفل ورقة القاعدة بحيث يوجد مسافة لوضع شريط لاصق لتثبيتهما معاً take the other 2 pieces of paper and lay them underneath the base paper with a small space to put a tape and stick them together.
الصقي الورقتين ببعضهما باستخدام الشريط اللاصق ذي الوجهين using the double sided tape stick the papers together

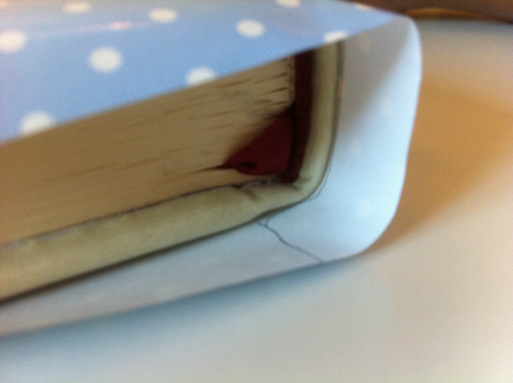
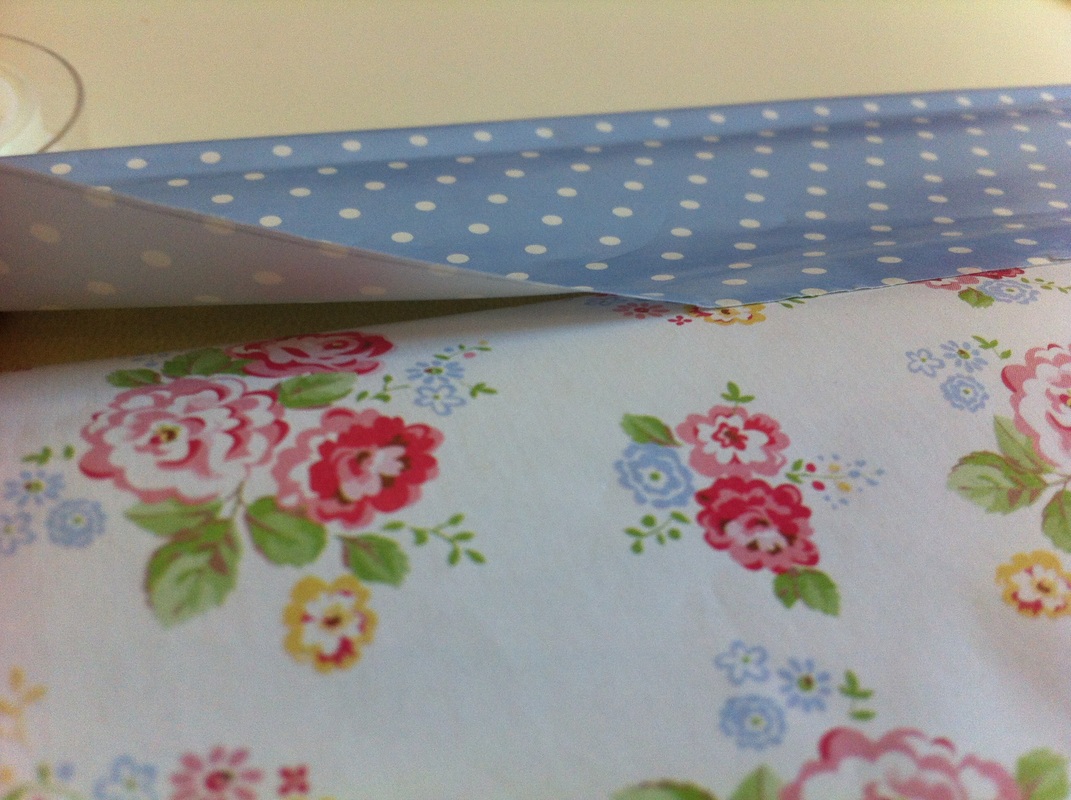
لعمل الزوايا، اطوي الورقة حول غلاف المفكرة وهذا سينتج مثلثاً بارزا للاعلى for the corners, fold the paper around the edges of the cover and that will make protruded or raised triangular
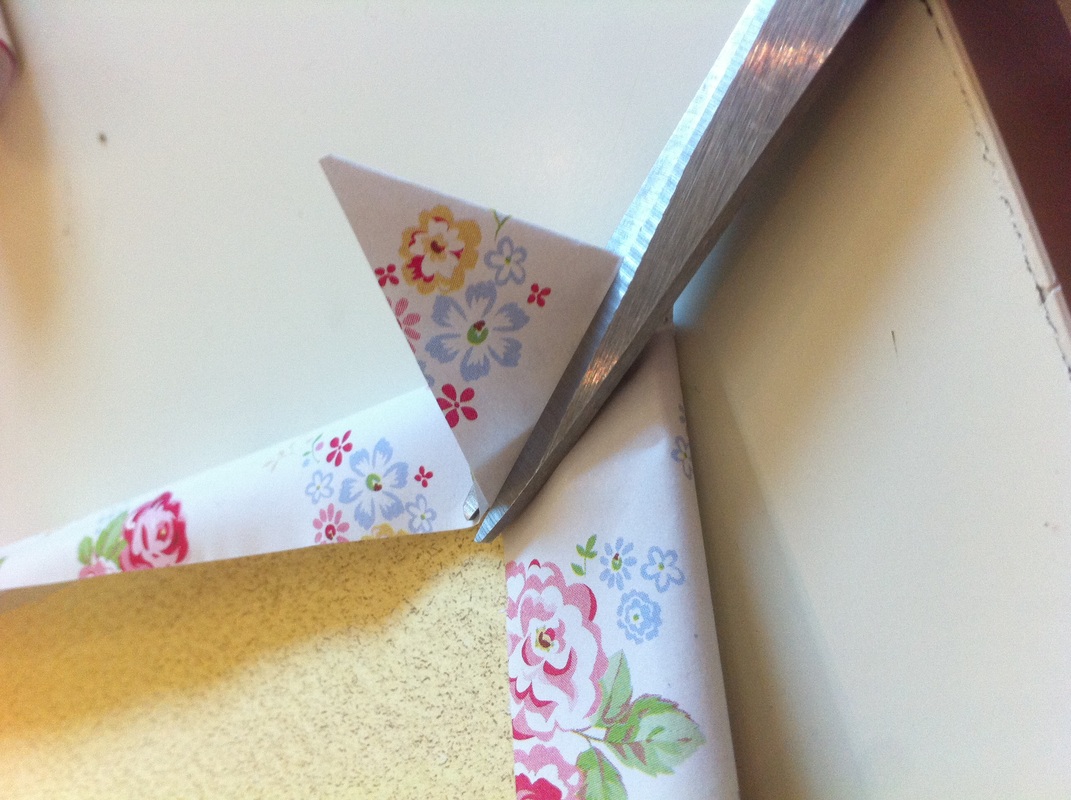
قصي هذا المثلث الزائد cut the triangular
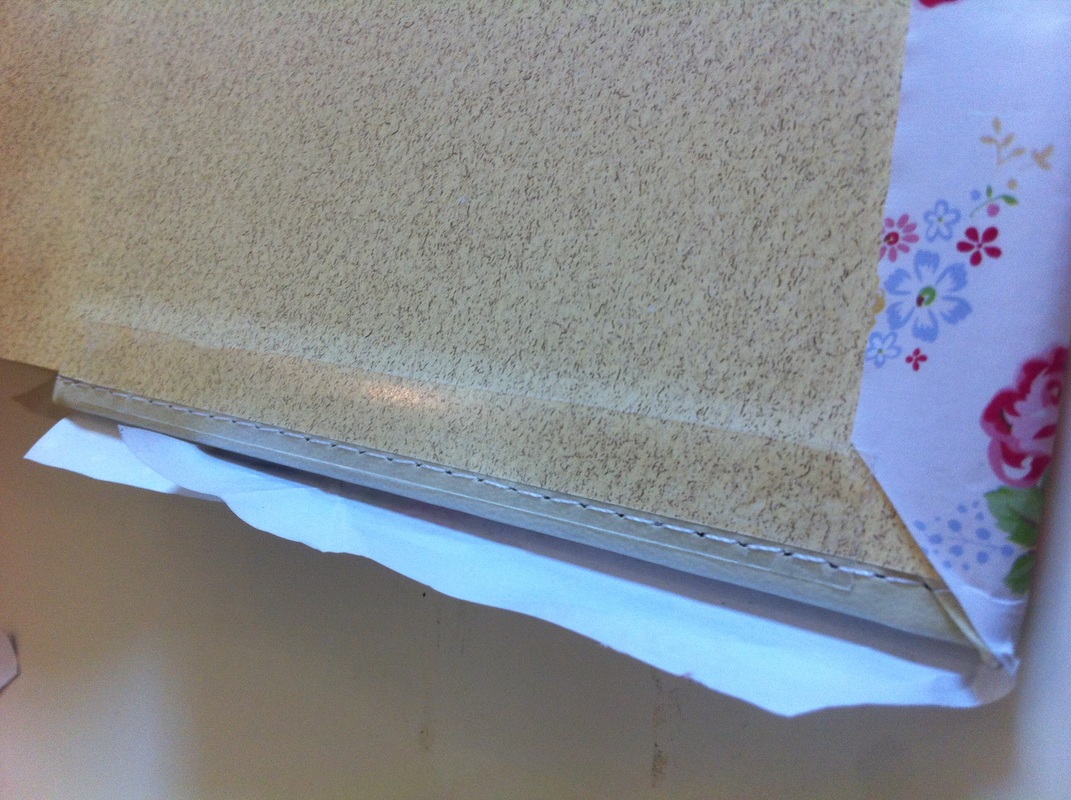
ضعي قطعة من الشريط اللاصق على حواف المفكرة لالصاق الورق paste the boarders using the double sided tape
هذا سيكون الشكل النهائي للمفكرة ومن هنا يأتي دورك بالابداع at this point your diary should look this and thats where your creation begin
ضعي كل الزينة التي تريدين^^ decorate your planner as you wish ^^
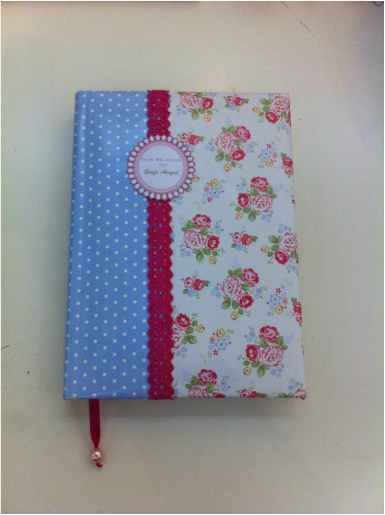
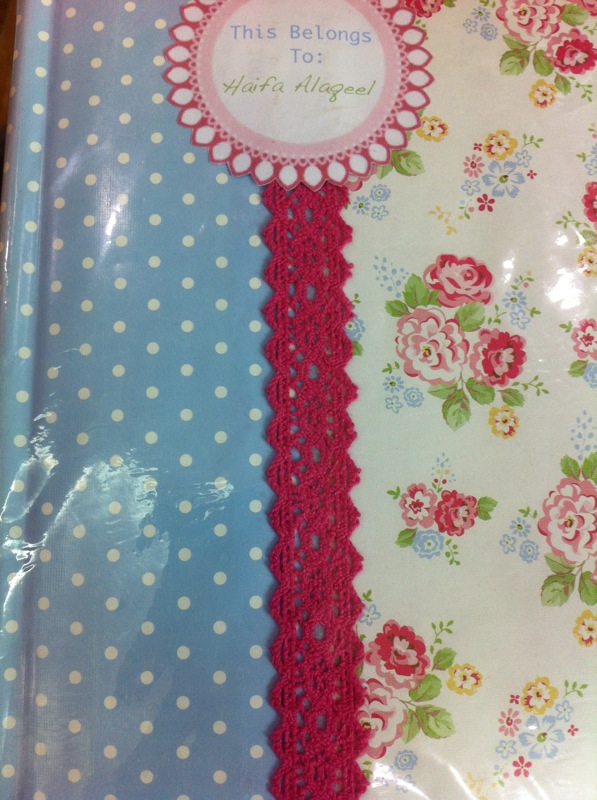
ضعي اسمك والعام في الغلاف الامامي tag your name and the year on front cover
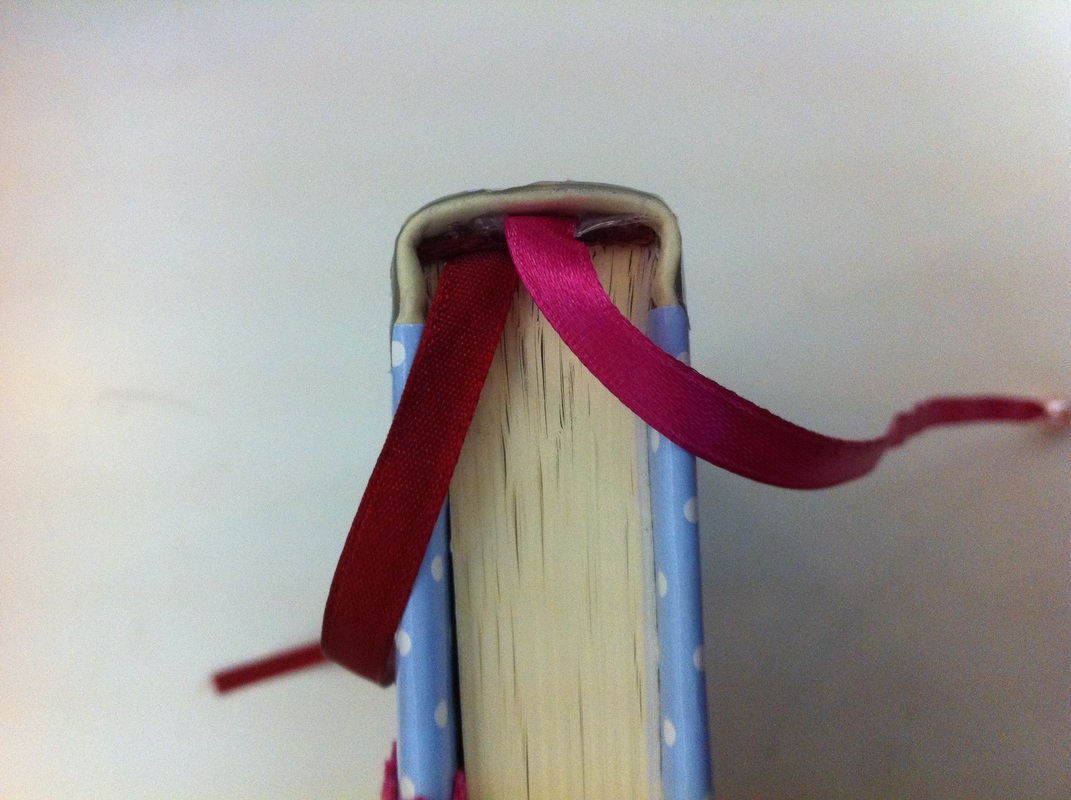
لتغيير شريطة المفكرة ادخلي الشريط في المساحة الصغيرة بين غلاف المفكرة والاوراق وثبتيها باستخدام صمغ المسدس، فتح المفكرة قد يساعد على زيادة تلك المساحة مما يسهل ادخال الشريطة وتثبيتها to change the bookmark, insert the ribbon of your choose in the small space between the cover and the paper packs. using the glue gun stick the new bookmark. keeping the planner open may help increasing the space so that inserting the ribbon will be easer
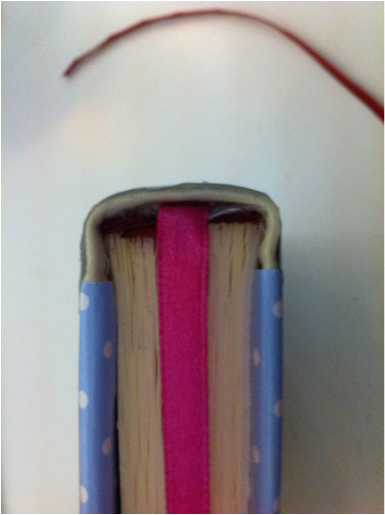
قصي الشريطة القديمة عندما تتاكدين من التصاق الشريطة الجديدة جيداً بالمفكرة . cut the old ribbon once you are sure that the new one is highly attached to the diary
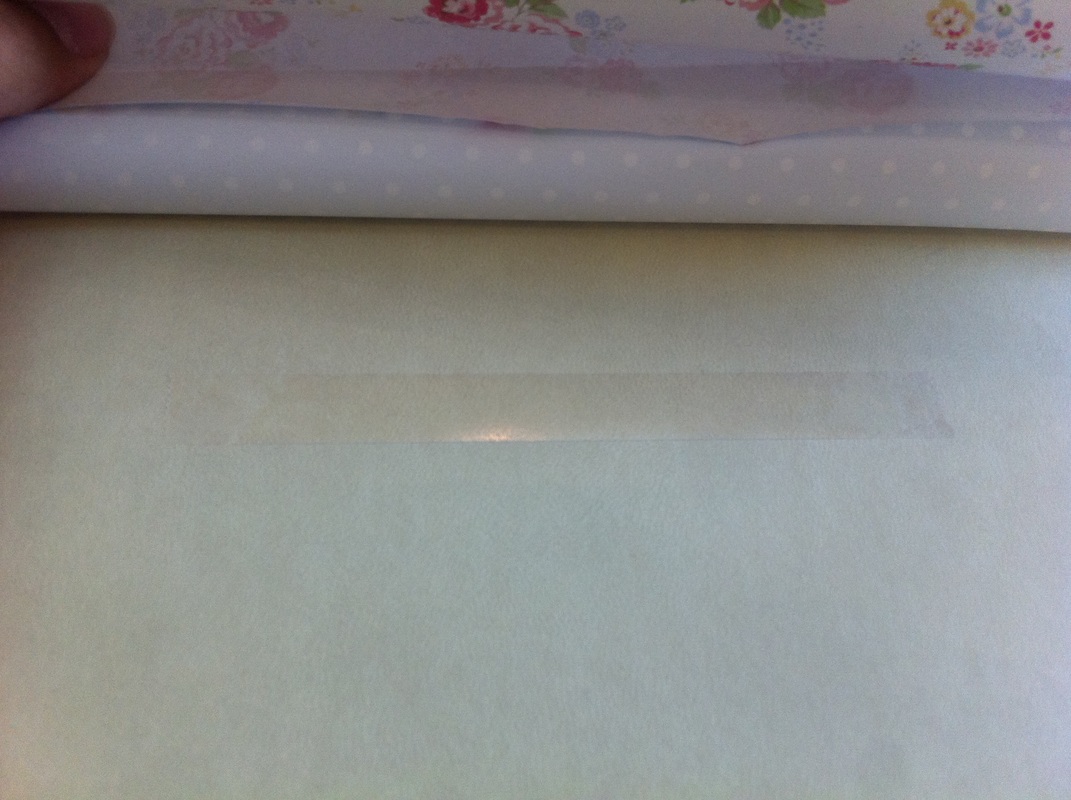
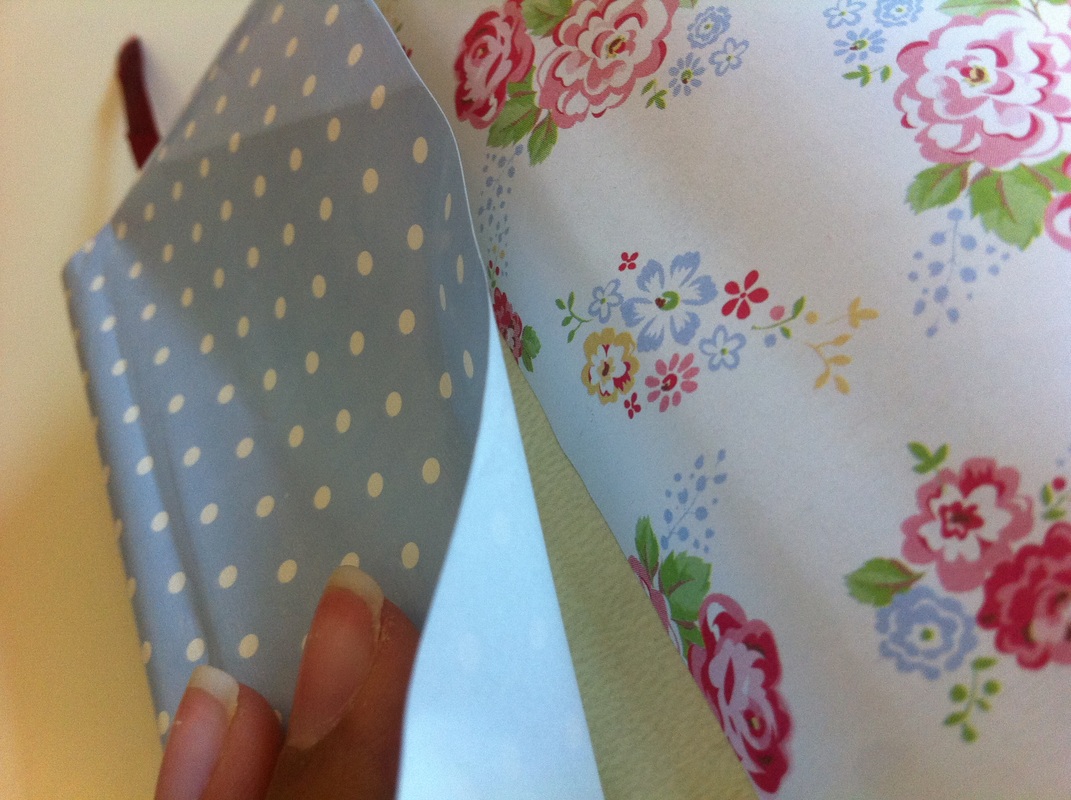
احضري ورق بلاستيك وغلفي المفكرة بالطريقة نفسها التي استخدمناها مع الورق cover the your planner with a plastic cover the same way.

وأخيراً يمكنك اخفاء كل تلك المناظر القبيحة في الغلاف من الداخل بالصاق مظروف عليها finally, you can hide all the unsightly scenes at the internal side of the cover using an envelope
.أتمنى ان تنال طريقتي اعجابكم ^^ وشاركوني ابداعاتكم.
^^ وبالتوفيق
Hope you all liked my planner. and please share your creations with me ^^ enjoy
^^ وبالتوفيق
Hope you all liked my planner. and please share your creations with me ^^ enjoy

 RSS Feed